


[vc_row][vc_column][vc_column_text]
Eye makeup is an essential part of every MUA’s makeup routine. From bold liner to smokey eyes, perfect brows to fluffy lashes, the beauty community has never been better at creating dramatic and impressive looks.
We’ve listed all the eye makeup tips you need to stay at the top of your game when it comes to brows, eyeshadow, liner and lashes.
Eyebrows
Eyebrows have evolved into one of the most important parts of any makeup look.
Perfectly carved out ‘Instagram brows’ are something everyone expects in the makeup chair, so you need to know how to get those eyebrows on fleek.[/vc_column_text][vc_single_image image=”2944″ img_size=”full” alignment=”center”][vc_column_text]Follow these steps to the perfect eyebrows:
1. Prep
-Pluck any stray hairs and use small scissors to cut hairs down to the same length if necessary
-Pick a product type, i.e. pencil or gel/powder with a flat angled brush. Gels are more intense so use them with caution, while pencils and powders are a good starting point for beginners
TOP TIP: Eyebrows should be two shades lighter than the hair colour to look natural
2. Application
-Brush the brow hairs upwards with a spoolie (this is a small wire brush)
-Following the natural shape of the brow, draw a line to define the bottom half
-Use light motions to fluff up the baseline into the natural hairs
-Repeat with the top of the brow and blend down
-Use very light strokes to avoid harsh lines which will make the brows look heavy and unnatural
-The tail of the brow should be darkest and gradually get lighter into the middle
TOP TIP: If your client has thin eyebrows, make them appear thicker by creating artificial hairs with light strokes in an up and outwards direction.
3. Finish
-Brush the brows through again then set the hairs in place with an eyebrow gel – a tinted gel will add more texture but don’t go too dark
-Conceal around the brows with a light shade for a precise finish, then set with pressed powder
-Highlight the brow bone with a gold or silver highlighter to lift the brows[/vc_column_text][vc_cta h2=”Always wanted to be a professional MUA?” h4=”We offer industry level makeup artistry courses across eight training centres!” txt_align=”center” add_button=”bottom” btn_title=”Makeup Artistry Courses” btn_style=”custom” btn_custom_text=”#666666″ btn_size=”lg” btn_align=”center” btn_link=”url:https%3A%2F%2Fposhnailz.co.uk%2Ftraining%2F%3Flocation%3D%26course_type%3D28|||”][/vc_cta][vc_column_text]
Eyeshadow
Eyeshadow is a skill that takes practice, and there are lots of eye makeup tips to learn.
Once you get to grips with the basics, this can be one of the most enjoyable and creative parts of the makeup routine. [/vc_column_text][vc_single_image image=”2945″ img_size=”full” alignment=”center”][vc_column_text]
1. Prep
-Choose what type of eyeshadow you’re going to use, i.e. pressed, loose pigment, cream or shimmer. Pressed eyeshadow is the most versatile for creating lots of looks, but it’s good to have a variety of palettes and shades available.
-If the makeup is for an event, ask the client what they’re wearing to make sure that the makeup will complement the colour of their outfit
TOP TIP: If your client has requested a bold lip, then keep the eyes natural or match the eyeshadow colour to the lips for a more intense look.
-Apply eyeshadow primer to prevent creasing and enhance the staying power of the makeup
-If you want to create a cleaner finish, apply masking tape at an angle on the outer corner of the eye – this will create a sharp line instead of a blend, which is good for cat eyes and cut creases.
-Eyeshadow fallout can be avoided using eyeshadow shields, which are cotton stickers applied under the eye.
Colours
-Apply eyeshadow shades which will complement the colour of your clients’ eyes.
-Colours opposite each other on the colour wheel will complement each other the most
-Neutral tones; nudes and light browns work well with all eye colours
-Warm tones; oranges, coppers and reds bring out blue eyes
-Cold tones; blues and purples make green eyes pop
-Dark brown, black and bronze make brown eyes smoulder
Brushes
-Small pointed or angled brushes are the most suitable for eyeliner, cut creases and inner corner highlighting as you can get into small areas and draw thin lines
-Fluffy, blending brushes are the most effective at smoking out colours and blending different shades into one another
-Flat, dense brushes are good at holding pigment so you can pack colour onto the eyelid.
TOP TIP: Tap the brush to remove excess pigment before applying to reduce the risk of fallout.
2. Application
-The base shade should be a neutral skin colour to create a blank canvas
-Apply a transition shade in the crease, and lower lash line – light brown/nude tones help blend brighter colours into each other
-Applying a darker shade in the crease and a lighter shade on the lid will make eyes appear bigger
-Wet the eyeshadow with water or setting spray to get a more intense pigment
-Make the eyes look bigger and brighter by applying highlighter/glitter on the inner corners
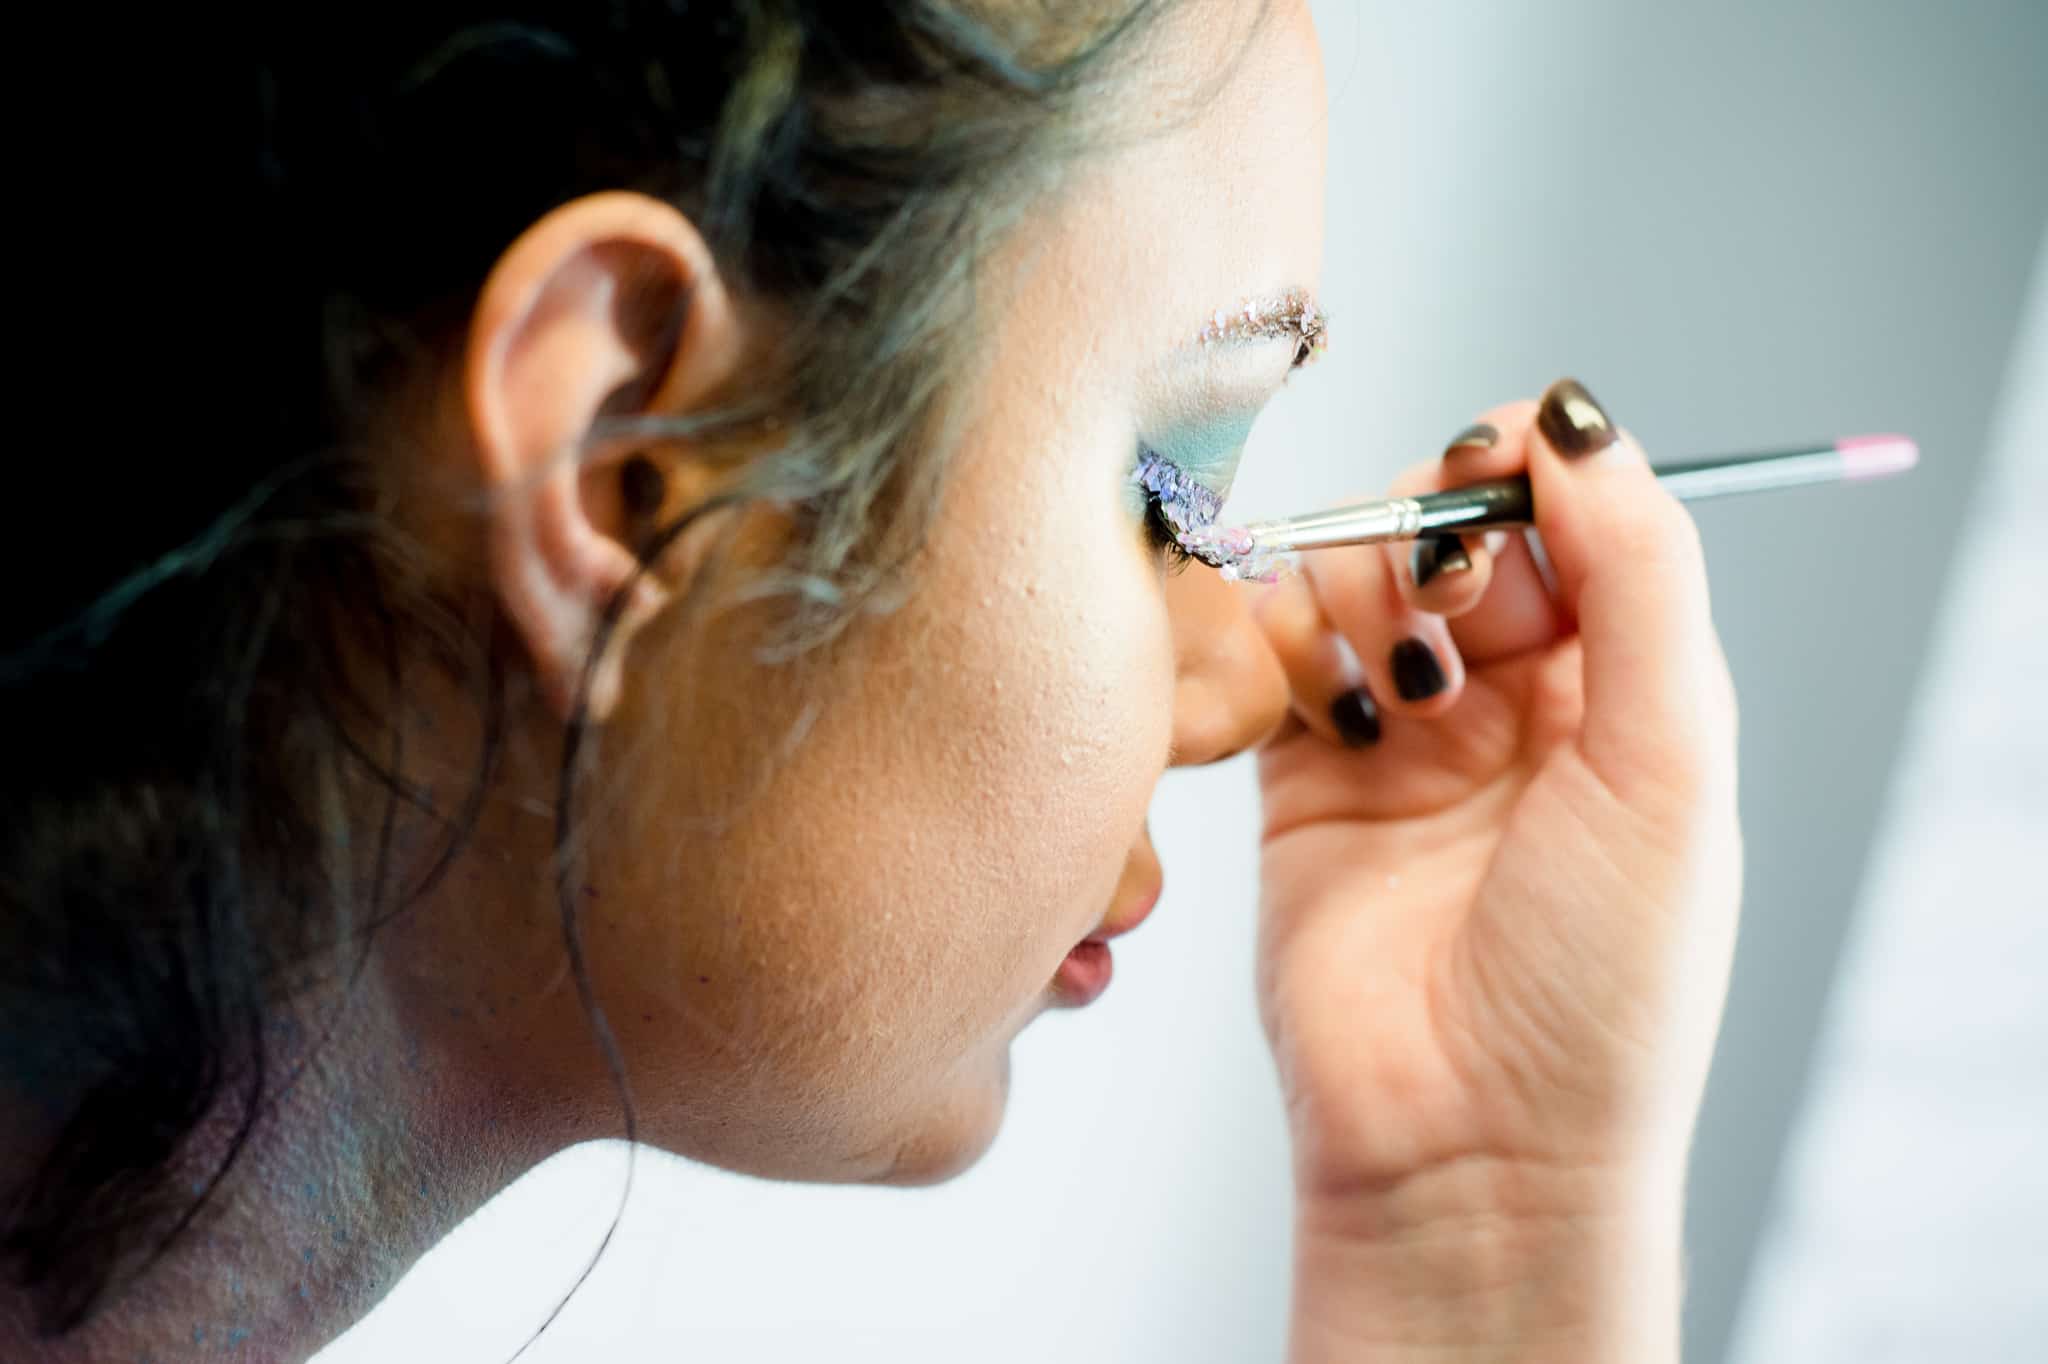
Smokey eye
[/vc_column_text][vc_single_image image=”2943″ img_size=”full” alignment=”center”][vc_column_text]-This look is all about blending – one of the essential eye makeup tips when creating professional eyeshadow looks
-Begin by applying a darker shade on the lids
-Smoke out the darker colour with a transition shade
-Take a lighter colour and blend it into the crease to further smoke out the lid
-Apply the transition and lighter shades on the lower lash line, then carefully layer the darker shade on top
-Use smaller brushes on the lower lash line as there is less room to blend out without dragging the eyes down
-Line the waterline and tightline (makes eyelashes look thicker and darker) with a dark kohl pencil, then smudge it out slightly to blend the liner into the eyeshadow
-Apply a generous coating of mascara on the top and bottom lashes, then apply dramatic false lashes over the top
Cut crease
[/vc_column_text][vc_single_image image=”2946″ img_size=”full” alignment=”center”][vc_column_text]-This look is all about precision
-Pack a bright colour into the crease with a small blending brush
-Smoke this out with a lighter shade and a larger blending brush
-Carve out a curved line with concealer just above the eyelid and into the blended colour
-Fill in the whole eyelid with concealer and set it with a lighter shade of eyeshadow or shimmer
-Use the same colours on the undereye as in the crease
-Apply winged eyeliner following the shape of the cut crease
-Highlight the inner corner
-Line the tightline with a black kohl pencil, and the waterline with a colour that complements your chosen shades, e.g. white eyeliner will suit a lighter look
-Apply mascara on the top and bottom lashes, then apply tapered false lashes on top to enhance the cat eye effect
TOP TIP: Avoid dark, heavy looks on hooded eyes. Instead, use shimmer and false eyelashes to open up the eyes.
[/vc_column_text]
Eyeliner
Eyeliner, one of the trickiest eye makeup tips, frames the eyes by adding extra depth to eyeshadow looks.
Forms of eyeliner include liquid, gel and pencil/kohl, which each have different purposes and application techniques.
1. Liquid and gel
Liquid and gel liners are applied wet, then they dry to a matte texture. Their smudge resistance makes them the best eyeliners for creating durable looks.
Winged Liner
[/vc_column_text][vc_single_image image=”2949″ img_size=”full” alignment=”center”][vc_column_text]There are many different eye makeup tips for applying winged liner, but for beginners, this is usually the most straightforward:
-Draw a line with the eyeliner brush as close to the lash line as possible, using small strokes so you can control the shape
-Place a dot on the end of your client’s eye where you want the wing to end, then connect it to the lash line in a triangle shape
-Fill the triangle in making sure not to leave any gaps
-Use concealer to clean up the edges or make the wing sharper
-Stand back from the client to check the wings are even and make any adjustments
2. Pencil/Kohl
Pencil/kohl liners can be used in the waterline and tight line to intensify eyeshadow looks or brighten the eyes. Applying white in the waterline makes the eyes appear bigger, whereas black makes them look smaller.
Smokey cat-eye
-Warm up the pencil to make it easier to smudge
-Once you’ve applied eyeshadow, repeat the winged liner steps but with a black pencil instead.
-Smoke the pencil wing out with a small brush onto the eyelid
TOP TIP: You can create unique looks with eyeliner by experimenting with different colours, from blue to shimmers to neon.
[/vc_column_text][vc_column_text]
Mascara
A perfect mascara application is essential for bringing any eye makeup look together.
Most clients will expect their lashes to look long, healthy and dark. But for festival season and editorial looks, it’s handy to have different colours available so you can create unique looks.[/vc_column_text][vc_single_image image=”2951″ img_size=”full” alignment=”center”][vc_column_text]
1. Prep
– Mascara can thicken or lengthen the lashes, so it’s a good idea to layer different formulas to create the perfect set.
-Make sure to use a new mascara wand on each client to avoid eye infections.
2. Application
-Curl the lashes for at least 10 seconds each with an eyelash curler
TOP TIP: Heat the eyelash curler with a hairdryer for a more intense curl.
-Coat the mascara wand and wipe away any excess to avoid clumping
-Ask the client to look forward and down
-Use zig-zag motions to coat each lash and repeat on both sides of the lashes until they’re at the desired thickness and length
-Gently lift the eyelid to get to the root of the eyelashes
-Use a smaller wand to coat the bottom lashes and apply lightly to avoid making them too long, as this will drag the eyes down
3. Finish
-Remove clumps with an eyelash brush before the mascara sets and clean any mistakes with a damp cotton bud [/vc_column_text][vc_column_text]
False Eyelashes
False eyelashes have recently grown in popularity, as people want the full celebrity glam.
Luckily, MUAs can usually get a discount if they buy in bulk so you can stock up on all different styles![/vc_column_text][vc_single_image image=”2952″ img_size=”full” alignment=”center”][vc_column_text]False eyelashes come in a variety of natural and dramatic styles – from fluffy to spikey, thin to tapered. There are two main types of false eyelashes – strip and individual.
Strip Lashes
-First and foremost, check that your client isn’t allergic to latex glue and always have a latex-free alternative available.
-Measure the size of the strip lash against the client’s eye and cut it to size if necessary
-Apply a thin layer of glue to the strip and wait for it to get tacky for around 15-25 seconds
-Stick the lashes as close as possible to the lash line with your fingers or tweezers
-Apply mascara to blend the natural lashes into the false ones
TOP TIP: Liquid eyeliner helps to create a seamless blend between the false and real lashes.
Individual Lashes
-Squeeze a small amount of individual lash glue into a small dish or palette
-Dip each lash into the adhesive with tweezers then stick them onto the lash line
-Apply longer lashes on the outside, getting smaller as you work inwards[/vc_column_text]

Eye makeup is the most technical aspect of any makeup routine, so once you master these eye makeup tips, you’ll be one step closer to creating professional looks. Make sure you’ve read our previous blog on the basics of makeup so you can master the whole routine.
[/vc_column_text][vc_cta h2=”Always wanted to be a professional MUA?” h4=”WE OFFER INDUSTRY LEVEL MAKEUP ARTISTRY COURSES ACROSS EIGHT TRAINING CENTRES!” txt_align=”center” add_button=”bottom” btn_title=”Makeup Artistry Courses” btn_style=”custom” btn_custom_text=”#666666″ btn_size=”lg” btn_align=”center” btn_link=”url:https%3A%2F%2Fposhnailz.co.uk%2Ftraining%2F%3Flocation%3D%26course_type%3D28|||”][/vc_cta][/vc_column][/vc_row]